Network nervous system dapp quick start
All changes to the configuration and behavior of the Internet Computer are controlled by an algorithmic governance system called the Network Nervous System (NNS). The NNS controls all aspects of the Internet Computer blockchain configuration and is responsible for performing many network management operations. For example, the Network Nervous System (NNS) is responsible for:
Upgrading the protocol and guest operating system software used by the nodes that provide computing capacity to the network.
Inducting new node operators and machines into the network.
Creating new subnets to increase network capacity.
Splitting subnets to balance network load.
Configuring parameters that control how much must be paid by users for compute capacity.
Monitoring canister activity and node performance for malicious behavior and statistical deviations.
De-activating malicious software or under-performing nodes to protect the network.
The requests for changes and updates to the network are submitted to the NNS in the form of proposals. The NNS decides to adopt or reject proposals based on voting activity by neuron holders.
What are neurons?
For network participants to be able to vote on proposals, they need to lock up a stake of ICP utility tokens for a given period of time to create a representative called a neuron.
Because neurons represent a stake of ICP utility tokens, they also represent an identity with a ledger canister account and a principal that controls the ledger account.
Neurons provide the stability required for responsible governance of the Internet Computer by ensuring that the ICP utility tokens they represent cannot be exchanged for a specific period of time referred to as the lock-up period.
The following diagram provides a simplified view of the workflow for creating a neuron and the relationship between the neuron and ledger canisters.
Governance and voting rewards
When a person or organization has ICP utility tokens locked up in a neuron, the neuron holder can propose and vote on governance issues. To encourage participation, neuron holders are also rewarded for voting in proportion to the number of ICP utility tokens they have locked up and the length of the lock-up period up to a maximum of eight years.
Unlocking the stake held by a neuron
After network participants create a neuron, the locked balance of ICP utility tokens can only be unlocked by fully dissolving the neuron. In its locked state, the neuron has a fixed non-zero dissolve delay equivalent to the lock-up period. For example, assume you have a stake of 100 ICP utility tokens locked up for a period of five years. After successfully created the neuron with these settings, your dissolve delay is five years.
Based on the dissolve delay that decreases as time progresses, a dissolve timer determines how long it will take to completely dissolve a neuron.
When the dissolve timer reaches zero, the neuron owner—the ICP utility token holder who created the neuron, or an authenticated custodian, can dissolve the neuron and unlock the balance of ICP utility tokens.
The dissolved neuron ceases to exist and the stake of ICP utility tokens that the neuron represented is released to the appropriate ledger canister account.
Connect to the Internet Computer
To connect to the Internet Computer using the Network Nervous System (NNS) dapp:
Open a browser and navigate to the Network Nervous System (NNS) dapp.
Click Login to connect to Internet Identity.
If you haven’t previously registered, you can click Register with Internet Identity to register.
noteWe strongly recommend you add multiple devices and authentication methods to your Internet Identity. For example, register multiple physical devices like your computer and phone with a security key and using the authentication options that those devices—and browsers running on them—support.
For more information about creating an Internet Identity, see How to use Internet Identity.
After you have registered, you can click Login to authenticate using your anchor and the authentication method—for example, a security key or fingerprint—you have registered.
Click Proceed to access to the Network Nervous System (NNS) dapp.
Add an account
Logging on using an Internet Identity creates a Main account for you in the Internet Computer ledger. If your ICP utility tokens are associated with your developer identity; that is, the identity created by the SDK dfx command-line interface. Your Main account displays 0.00 for your ICP utility token balance. For example:
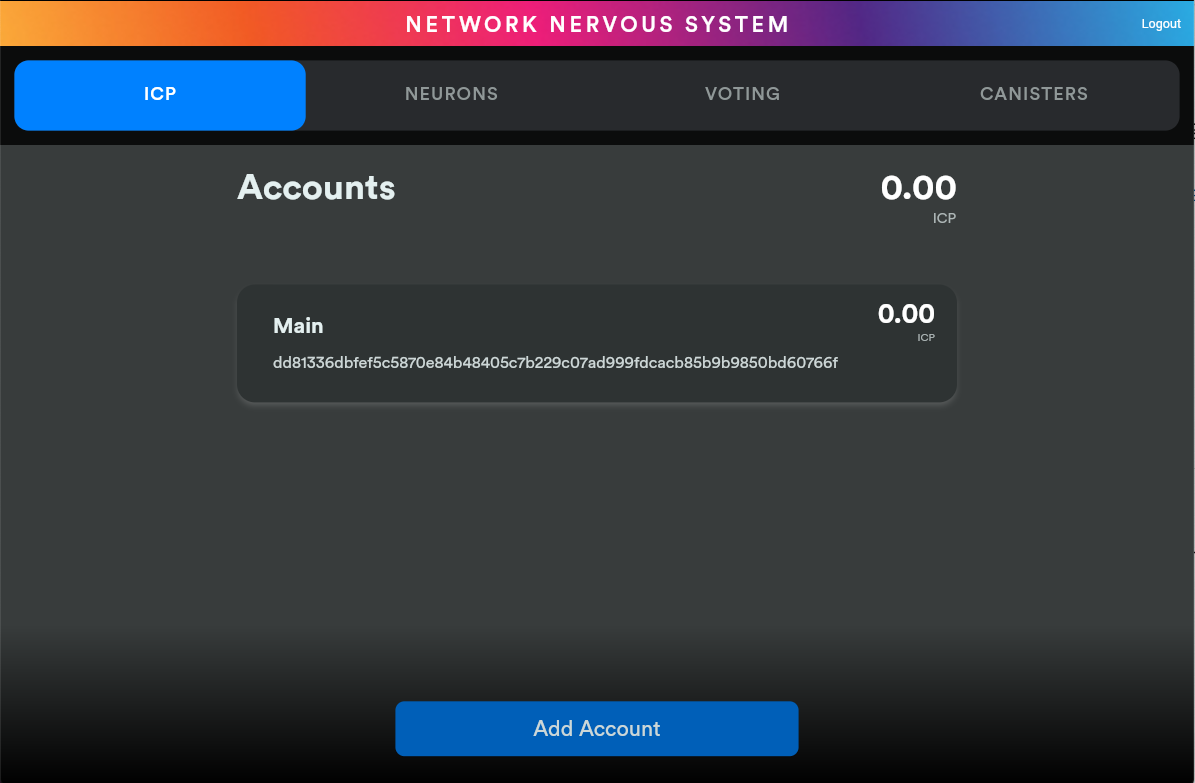
Before transferring any tokens, you can create one or more linked subaccounts or attach a hardware wallet to your account.
To add an account for managing ICP utility tokens:
Open a browser and navigate to the Network Nervous System (NNS) dapp.
Click Login to connect using your Internet Identity.
Verify your identification number, then click Login to authenticate using the device and authentication method you have registered.
Click Proceed to access to the Network Nervous System (NNS) dapp.
On the default ICP tab, click Add Account.
Select the type of account to add.
New Linked Account creates a new subaccount linked to your Main account address in the ledger.
Attach Hardware Wallet adds a hardware wallet to your main account address in the ledger.
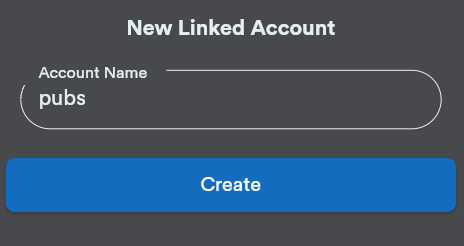
Click New Linked Account, type an Account Name, then click Create.
Transfer ICP utility tokens between accounts
If you have selected self-custody for holding your ICP utility tokens and the tokens are associated with your developer identity instead of your registered Internet Identity, you need to transfer ICP utility tokens to your accounts if you want to manage them using the Network Nervous System (NNS) dapp.
To transfer ICP utility tokens controlled by your developer identity:
Open a terminal shell on your local computer.
Check that you are using an identity with control over the ledger account by running the following command:
dfx identity whoamiIn most cases, you should see that you are currently using your
defaultdeveloper identity. For example:defaultView the textual representation of the principal for your current identity by running the following command:
dfx identity get-principalThis command displays output similar to the following:
tsqwz-udeik-5migd-ehrev-pvoqv-szx2g-akh5s-fkyqc-zy6q7-snav6-uqeCheck the current balance in the ledger account associated with your identity by running the following command:
dfx ledger --network ic balanceTransfer ICP utility tokens to your Main account or a linked subaccount you create by running a command similar to the following:
dfx ledger --network ic transfer <destination-account-id> --icp <ICP-amount> --memo <numeric-memo>For example, assume you have the following accounts:
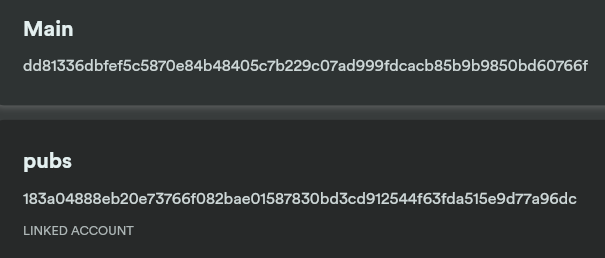
If you want to transfer one ICP utility token to the
Mainaccount, you can run the following command:dfx ledger --network ic transfer dd81336dbfef5c5870e84b48405c7b229c07ad999fdcacb85b9b9850bd60766f --memo 12345 --icp 1If you also want to transfer one ICP utility token to the
pubsaccount, you can run the following command:dfx ledger --network ic transfer 183a04888eb20e73766f082bae01587830bd3cd912544f63fda515e9d77a96dc --icp 1 --memo 12346This example illustrates how to transfer ICP utility tokens to using a whole number with the
--icpcommand-line option.You can also specify fractional units of ICP utility tokens—called e8s—using the
--e8soption, either on its own or in conjunction with the--icpoption.Alternatively, you can use the
--amountto specify the number of ICP utility tokens to transfer with fractional units up to 8 decimal places, for example, as5.00000025.
The destination address can be an address in the ledger canister running on the Internet Computer network, an account you have added using the Network Nervous System dapp, or the address for a wallet you have on an exchange.
If you transfer the ICP utility tokens to an account in the Network Nervous System dapp, you might need to refresh the browser to see the transaction reflected.
For more information about using the
dfx ledgercommand-line options, see dfx ledger.
Stake ICP utility tokens in a neuron
After you transfer ICP utility tokens to the Network Nervous System dapp, you can use the Network Nervous System dapp to create and manage neurons, vote on proposals, and create canisters on the Internet Computer.
Neurons are required to participate in governance and earn rewards. To create a neuron, you must lock up some number of ICP utility tokens for a period of time. The minimum stake required to create a neuron is one ICP utility token. You can configure the period of time the stake is locked from six months up to a maximum of eight years.
To stake ICP utility tokens:
Open a browser and navigate to the Network Nervous System (NNS) dapp.
Click Login to connect using your Internet Identity.
Verify your identification number, then click Login to authenticate using the device and authentication method you have registered.
Click Proceed to access to the Network Nervous System (NNS) dapp.
Click Neurons, then click Stake Neuron.
Type the number of ICP utility tokens to stake, then click Create.
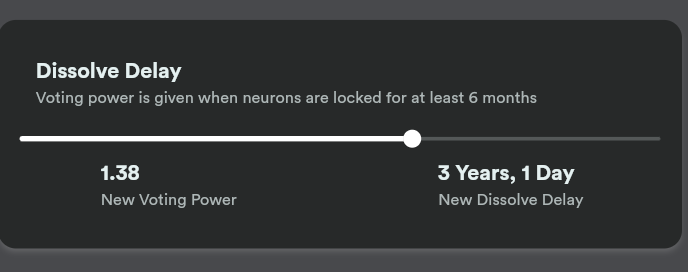
Set the dissolve delay for the neuron to control the length of time the stake is locked, then click Update Delay.
For example:
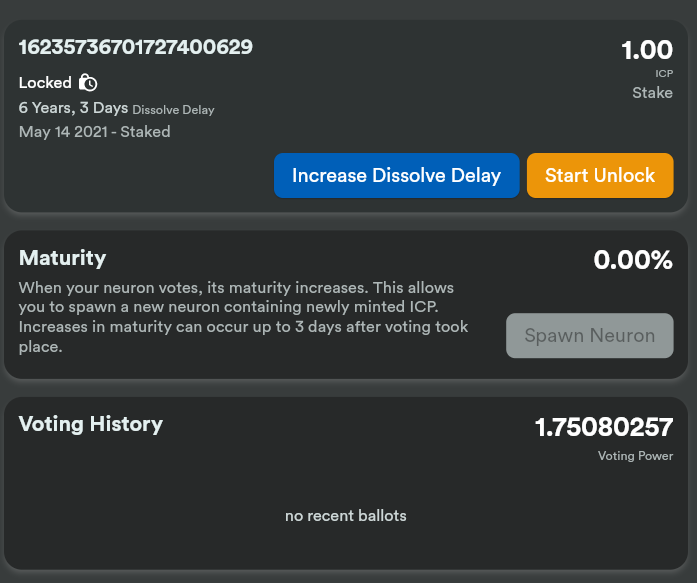
Click Yes, I’m sure to confirm the lock up period, then close the window to review the newly-created neuron properties.
What you can do after creating a neuron
After you have locked the stake and created a neuron, you can:
Start the dissolve delay timer by clicking Start Unlock.
Increase the dissolve delay period by clicking Increase Dissolve Delay.
Stop the dissolve delay after starting the unlock countdown by clicking Lockup.
Increase the number of ICP utility tokens you have staked.
Starting and stopping the dissolve delay
Creating a new neuron does not automatically start the dissolve delay timer. You must explicitly start the timer countdown by clicking Start Unlock.
For example, if you set a dissolve delay of one year and want to immediately begin the countdown, you should click Start Unlock as part of the process of creating the neuron. If you change your mind and want to stop a current countdown in progress, you can click Lockup, After you click Lockup to stop the dissolve delay, you can click Start Unlock to resume the countdown without changing the existing dissolve delay period. If you want to continue a countdown already in progress but extend the lock up period, you can click Increase Dissolve Delay then select a longer dissolve delay.
Adding ICP utility tokens to an existing neuron
After you create a neuron, you can increase the number of ICP utility tokens you have staked in that neuron to increase your voting power and rewards. For example, if you initially stake a small number of ICP utility tokens, then decide to purchase additional tokens, you have the option to create a new neuron or "top-up" your existing neuron.
To increase the stake in an existing neuron:
Follow the steps in Stake ICP utility tokens in a neuron to stake the original neuron using the Network Nervous System (NNS) dapp.
Look up the transaction in the Internet Computer Association transaction dashboard to get the neuron address.
You can use the account identifier for your main ICP ledger account to search for your transactions.
Return to the Network Nervous System (NNS) dapp, then click New Transaction.
Paste the neuron address from the transaction dashboard into the Destination address field, then click Continue.
Type the amount of ICP utility tokens you want to add to the specified neuron, then click Continue.
Verify the transaction details, then click Confirm and Send.
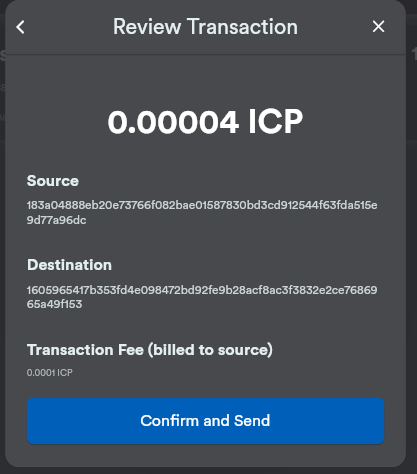
Verify the completed transaction, then click Close.
Click the Neurons tab to see the increased stake.
Configure following rules
Active participation in governance is an important factor in the long-term health of the Internet Computer. Voting on proposals is also an important factor in calculating the rewards you receive in return for locking up ICP utility tokens in neurons.
However, voting directly on every proposal submitted to the NNS presents several challenges. For example, proposals might be submitted and require a vote when you are unavailable or propose changes that you lack the expertise to evaluate. To address these challenges, you can configure neurons to vote automatically to adopt or reject proposals by following the votes of a group of neurons.
To maximize your rewards, you should vote on as many proposals as possible by following the active neuron holders who have interests aligned with your own. For example, you might follow the Internet Computer Association (ICA) on some topics such SubnetManagement and other neuron holders on topics such as Governance.
To configure how you follow other neuron holders:
Open a browser and navigate to the Network Nervous System (NNS) dapp.
Click Login to connect using your Internet Identity.
Verify your identification number, then click Login to authenticate using the device and authentication method you have registered.
Click Proceed to access to the Network Nervous System (NNS) dapp.
Click Neurons, then click the link for a specific neuron identifier to display its properties.
Click Edit Followees.
Choose a proposal topic.
For example, expand the Governance topic, then click Enter Followee.
Select a neuron holder to follow, then click Follow.
For example, click Follow for the Internet Computer Association.

The neuron holder is added to you Currently Following list.
Repeat for each topic where you want your neuron’s votes to automatically follow the votes of one or more other neuron holders.
Disburse dissolved neurons into an account
When the dissolve delay timer for a neuron reaches zero, you can disburse the neuron’s stake and transfer its locked ICP utility token balance to the ledger account you specify. After you take this step, the neuron identifier and its ledger history are permanently removed from the governance canister.
To disburse a neuron and return its ICP utility tokens:
Open a browser and navigate to the Network Nervous System (NNS) dapp.
Click Login to connect using your Internet Identity.
Verify your identification number, then click Login to authenticate using the device and authentication method you have registered.
Click Proceed to access to the Network Nervous System (NNS) dapp.
Click Neurons, then click Unlocked neuron that has reach the ended of its dissolve delay period.
For example:

Click Disburse.
For example:

Type an address or select an account to receive the ICP utility tokens.
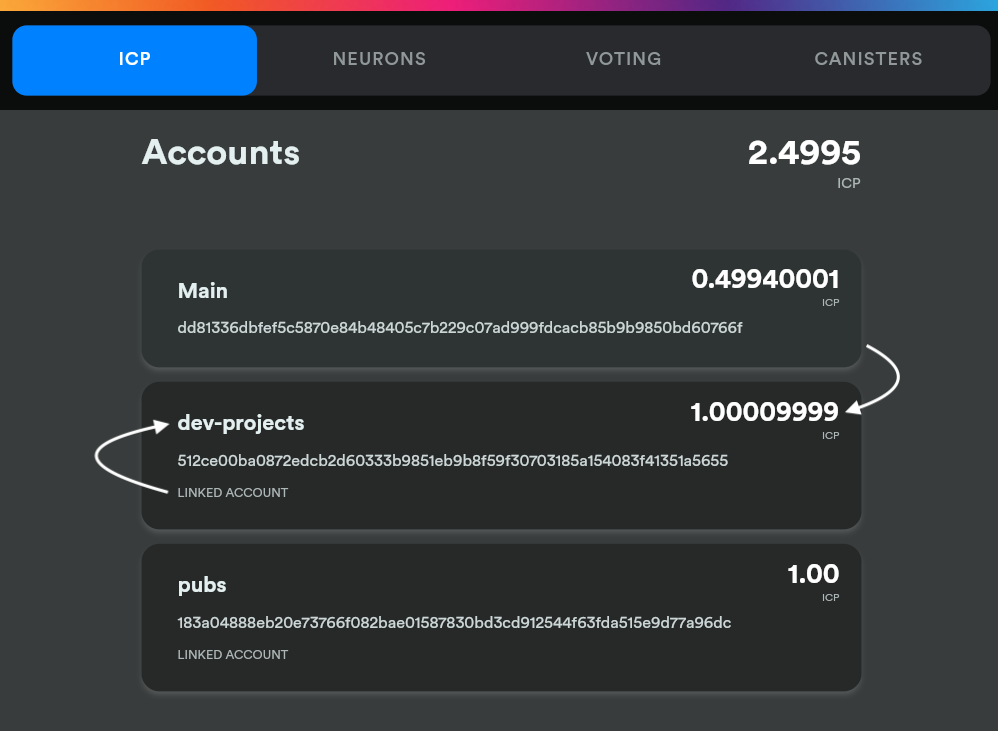
For example, you might select the
dev-projectslinked account:Verify the transaction information, then click Confirm and Send.
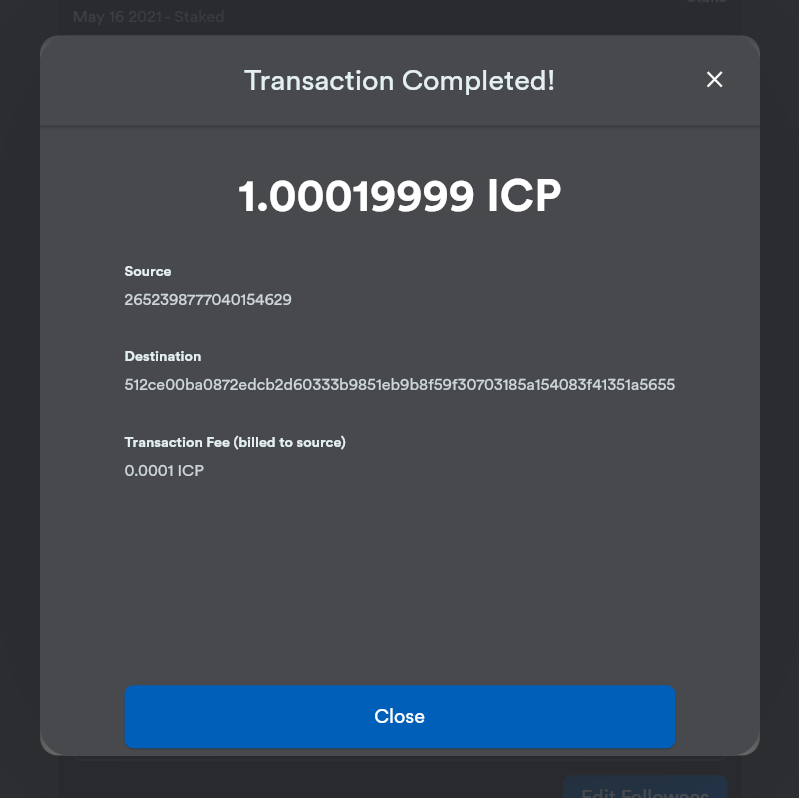
For example, check that the Destination address matches the intended address of the
dev-projectslinked account: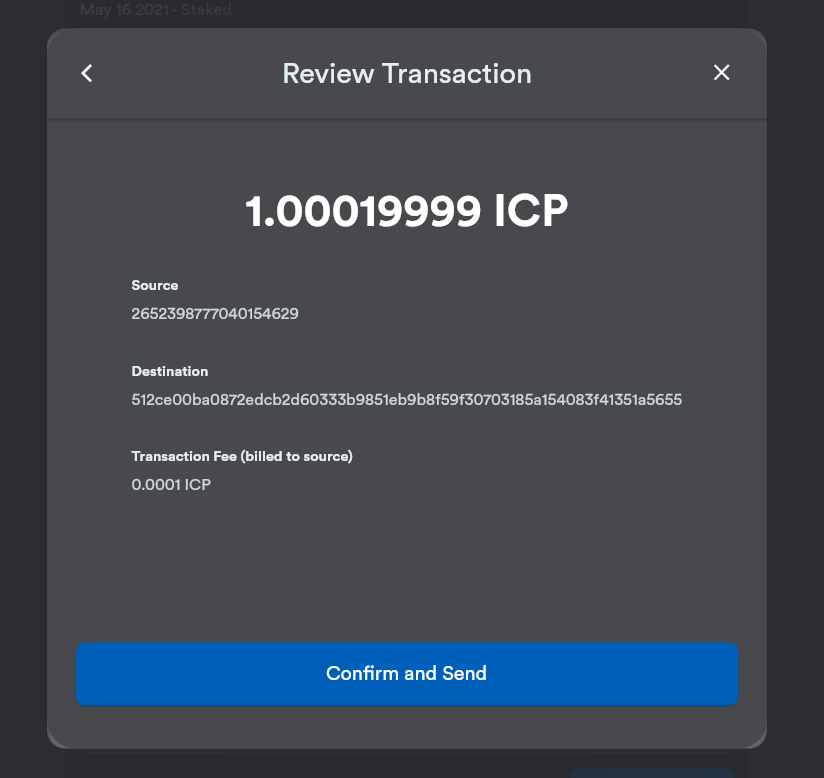
Verify the completed transaction, then click Close.
For example:
If you transferred the ICP utility tokens to one of your accounts in the Internet Computer ledger canister, you can click the ICP tab and see your new balance reflected. For example:
Spawn new neurons
As you vote on proposals—either directly or by following the votes of other neurons—the maturity associated with your neuron increases, which in turn increases the rewards you earn for participating in governance. When the maturity for a locked stake reaches a minimum threshold of one ICP, you can spawn a new neuron. The spawn operation creates a new neuron that locks a new balance of ICP on the ledger.
For example, if you have a neuron that contains 100 ICP utility tokens and it has a maturity of 10 percent, you can spawn a new neuron that contains approximately 10 new ICP tokens. For the neuron with 100 ICP tokens to reach the minimum threshold for spawning, its maturity would need to be greater than one percent.
After you spawn a new neuron from an existing neuron, the maturity for the existing neuron falls to zero.
To spawn new neurons from an existing neuron:
Open a browser and navigate to the Network Nervous System (NNS) dapp.
Click Login to connect using your Internet Identity.
Verify your identification number, then click Login to authenticate using the device and authentication method you have registered.
Click Proceed to access to the Network Nervous System (NNS) dapp.
Click Neurons, then click the neuron that has reached the minimum maturity required to spawn a new neuron.
Click Spawn Neuron.
Keep in mind that the dissolve delay for a newly-spawned neurons is one day, giving you the option to collect value from the ICP utility tokens by unlocking them or to increase the dissolve delay to collect additional rewards.
For more information about maturity and spawning new neurons, see the following articles:
Vote on proposals
You can choose the proposal types and proposal topics that you see and vote on—either directly or by following other neuron stakeholders—using filters in the Network Nervous System dapp. For example, if you want to review and vote on all proposals that involve network participants such as data center identities and node operators, but aren’t interested in viewing proposals related to the current market value of ICP, as measured by an International Monetary Fund (IMF) Special Drawing Right (SDR), you can select the ParticipantManagement topic filter and deselect the ExchangeRate topic filter.
To manually vote on proposals:
Open a browser and navigate to the Network Nervous System (NNS) dapp.
Click Login to connect using your Internet Identity.
Verify your identification number, then click Login to authenticate using the device and authentication method you have registered.
Click Proceed to access to the Network Nervous System (NNS) dapp.
Click Voting.
You can click any of the proposals listed to view information about the proposal, including a brief description of the proposal, a link for viewing additional information about the proposal, the number of votes that were cast to adopt or reject the proposal, and the votes cast by your neurons.
Use the Topics, Reward Status, and Proposal Status filters to control the list of proposals displayed.
For example, open the Topics list to see if there are any proposal topics that you want to include in the proposal list that are not currently displayed and open the Proposal Status to verify that you are viewing all open proposals.
Click any Open proposal to see its details and the voting power for the neurons associated with your identity.
Select the neuron identifiers with voting power that you want to use to cast your vote.
Click Adopt or Reject to cast your vote.
For more information about voting and voting rewards, see the following articles:
Submit a proposal
Currently, you can only submit proposals to the network nervous system by using the SDK command-line interface (dfx) using calls to the governance canister.
A separate command-line tool (icx-nns) for working with the governance canister is in development and this functionality will also be available in the Network Nervous System (NNS) dapp soon.
If you want to start submitting proposals right away, however, you can access a preliminary version of the icx-nns command-line tool by downloading a release from the icx-nns repository.
Deploy a canister with cycles
You must have cycles available to create and manage canisters, which are similar to smart contracts. The Network Nervous System (NNS) dapp provides a convenient way for you to create and manage canisters by enabling you to convert ICP utility tokens into cycles and attach cycles to specific canister identifiers.
To create a new canister:
Open a browser and navigate to the Network Nervous System (NNS) dapp.
Click Login to connect using your Internet Identity.
Verify your identification number, then click Login to authenticate using the device and authentication method you have registered.
Click Proceed to access to the Network Nervous System (NNS) dapp.
Click Canisters, then click Create or Link Canister.
Click Create New Canister to create a new cycles wallet canister.
If you already have a cycles wallet canister, you can click Link Canister to Account to link an existing canister identifier to your account in the Network Nervous System (NNS) dapp.
Select one of your accounts that holds ICP utility tokens as the source account.
For example, if you have both a Main account and a Dev-Projects account, you might select Dev-Projects account if that account holds the ICP utility tokens that you want converted into cycles.
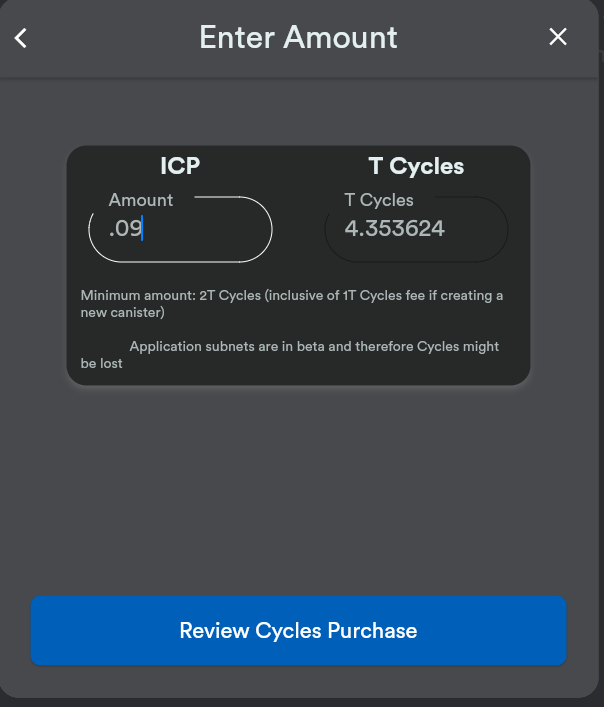
Click Amount and type the number of ICP utility tokens or e8s that you want to convert into cycles, then click Review Cycles Purchase.
The amount you specify must convert to a value greater than the 2T (two trillion) cycles minimum required to create a new canister identifier. For example:
Review the ICP utility tokens to cycles details, then click Confirm to continue.
After you click Confirm, you can review: - the new canister identifier - the number of cycles available for the canister to use - the controlling principal that currently has full management rights for the new canister
+ To change the principal used as the controller of the canister, click Change Controllers.
+ To add cycles to the canister, click Add Cycles.
Return to the Canisters tab to see the canisters you have created.
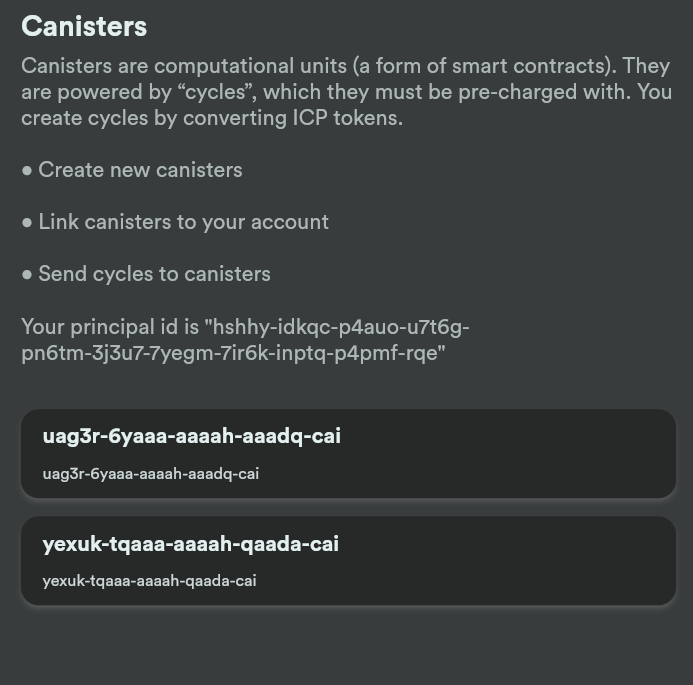
For example:
